All actors and crew were present and on time at the meeting place.
Tasks to be done:
Establishing shots of the area
Happy scene of Anna and Eden
Anna's possession (benches & trees)
Bench scene
Establishing shots of the area:
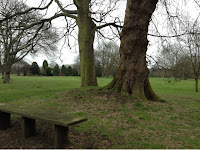
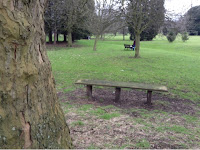
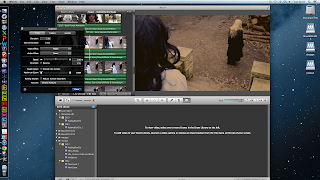
When we arrived at Hall Place we needed to take a few establishing shots of the area, for example having Anna and Eden walk past the house, to set the scene and inform the audience where we were.
We did this by having the camera on the tripod and by using long shots of Anna and Eden so we could get the house in the background of the shot and so we could see all of it.
Happy scene of Anna and Eden:
When creating the opening we realised that we needed shots of Anna and Eden happily together, showing that they had a loving sisterly relationship and something must have really pushed Eden to kill her own sister if they got on so well. To show this we had close up shots of their faces while they were talking as it would mean that the audience would be at an intimate distance from the actors and they would be portrayed as rather close as they were also at an intimate distance.
Anna's possession (benches & trees):
In order to show Anna's possession we had her jump of different benches one at a time, so we could (in our editing process) cut them up and mix the scenes together along with a clip of Anna walking up to the river (foreshadowing her death) to show her possession (or Eden's insanity)
We also had Anna run around a perfect circle of trees, however we decided not to involve this in our actual opening as it was not suitable and didn't portray our message clear enough.
Bench scene:
We filmed a scene with Anna running off and leaving Eden confused to show the progression from the happy scenes to the possessed scene, in this we had medium shots of the two and did panning shots of Anna running off. However we ended up discarding this shots as they were not clear enough.
Overall:
To sum up we managed to get some essential filming into this day and it was worth the time spent.
Sunday, 17 March 2013
Evaluation of the Day 28/02/13
All actors and crew were present and on time at the meeting place.
Tasks to be done
Death scene, Eden killing Anna
Eden & Anna walking past their house
Eden & Anna walking past the river
Anna possession
Death scene (Eden killing Anna)
 We filmed the death scene with Eden killing Anna (which is our first
twist that leaves the audience wondering what will happen in the rest of
the movie) as Eden bringing Anna down to the ground without seeing any
specific action, we thought this would be more suitable as an actual
action of Eden 'stabbing' Anna in the neck would end up unrealistic and
not effective. But to imply that she had been stabbed and that Eden was
killing Anna we filmed Eden holding a knife and edited it in before the
death of Anna came up to signal to the audience what is about to happen
and foreshadow the death. Here we used a close up shot of Eden's hand
holding the knife to create suspense and mystery around who was holding
it.
We filmed the death scene with Eden killing Anna (which is our first
twist that leaves the audience wondering what will happen in the rest of
the movie) as Eden bringing Anna down to the ground without seeing any
specific action, we thought this would be more suitable as an actual
action of Eden 'stabbing' Anna in the neck would end up unrealistic and
not effective. But to imply that she had been stabbed and that Eden was
killing Anna we filmed Eden holding a knife and edited it in before the
death of Anna came up to signal to the audience what is about to happen
and foreshadow the death. Here we used a close up shot of Eden's hand
holding the knife to create suspense and mystery around who was holding
it.
Eden & Anna walking past the river
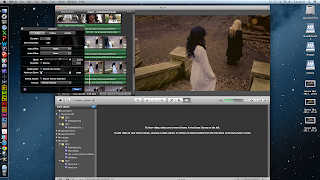
We then filmed both of them walking past a river which is brought up again when the nightgown drenched in blood is thrown into it to symbolize Anna's death. This was filmed to create a link between these clips and to show that there is a river in the area. It also is used as one of the happy memories Eden has when she is in the graveyard. Here we used medium shots of them two walking along so we could see them both clearly and to imply that they are happy memories we didn't have any canted shots.
Anna's possession
Finally we filmed Anna's possession which is to bring about ideas of why Eden killed Anna. Here we had Anna lay on the floor and contort and we used a POV shot to film this to give the impression that Eden was watching it and to give a shaky effect that matched what was going on on screen.


Tasks to be done
Death scene, Eden killing Anna
Eden & Anna walking past their house
Eden & Anna walking past the river
Anna possession
Death scene (Eden killing Anna)
 We filmed the death scene with Eden killing Anna (which is our first
twist that leaves the audience wondering what will happen in the rest of
the movie) as Eden bringing Anna down to the ground without seeing any
specific action, we thought this would be more suitable as an actual
action of Eden 'stabbing' Anna in the neck would end up unrealistic and
not effective. But to imply that she had been stabbed and that Eden was
killing Anna we filmed Eden holding a knife and edited it in before the
death of Anna came up to signal to the audience what is about to happen
and foreshadow the death. Here we used a close up shot of Eden's hand
holding the knife to create suspense and mystery around who was holding
it.
We filmed the death scene with Eden killing Anna (which is our first
twist that leaves the audience wondering what will happen in the rest of
the movie) as Eden bringing Anna down to the ground without seeing any
specific action, we thought this would be more suitable as an actual
action of Eden 'stabbing' Anna in the neck would end up unrealistic and
not effective. But to imply that she had been stabbed and that Eden was
killing Anna we filmed Eden holding a knife and edited it in before the
death of Anna came up to signal to the audience what is about to happen
and foreshadow the death. Here we used a close up shot of Eden's hand
holding the knife to create suspense and mystery around who was holding
it.
Eden & Anna walking past their house
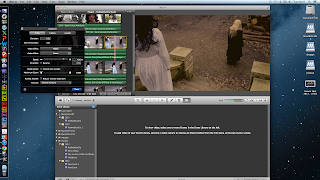
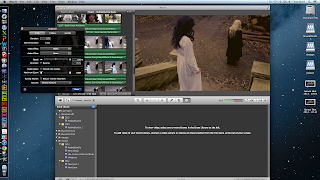
We
filmed Anna and Eden down the path and walking past an old fashioned
looking house in 'Hall Place' to imply the whereabouts of their house
and show that they are both of a high class. We also did this so that we
could show happier scenes of Anna and Eden together as sisters before
Anna's death and link Anna acting in the 'memory' shots with the picture
of Anna in Eden's hand at the graveyard. This therefore shows that Anna
and Eden had a happy, loving relationship before she died to brings up
the question of 'why did Eden kill her?' which would have been explain
further in the film though her possession was hinted at throughout the
opening (and the madness of Eden). Here we used a medium shot to show
happy memories and so they were both visible. |
| Large house within a park, well off. |
We then filmed both of them walking past a river which is brought up again when the nightgown drenched in blood is thrown into it to symbolize Anna's death. This was filmed to create a link between these clips and to show that there is a river in the area. It also is used as one of the happy memories Eden has when she is in the graveyard. Here we used medium shots of them two walking along so we could see them both clearly and to imply that they are happy memories we didn't have any canted shots.
Anna's possession
Finally we filmed Anna's possession which is to bring about ideas of why Eden killed Anna. Here we had Anna lay on the floor and contort and we used a POV shot to film this to give the impression that Eden was watching it and to give a shaky effect that matched what was going on on screen.

Editing post - finishing touches
Inserting the production company:
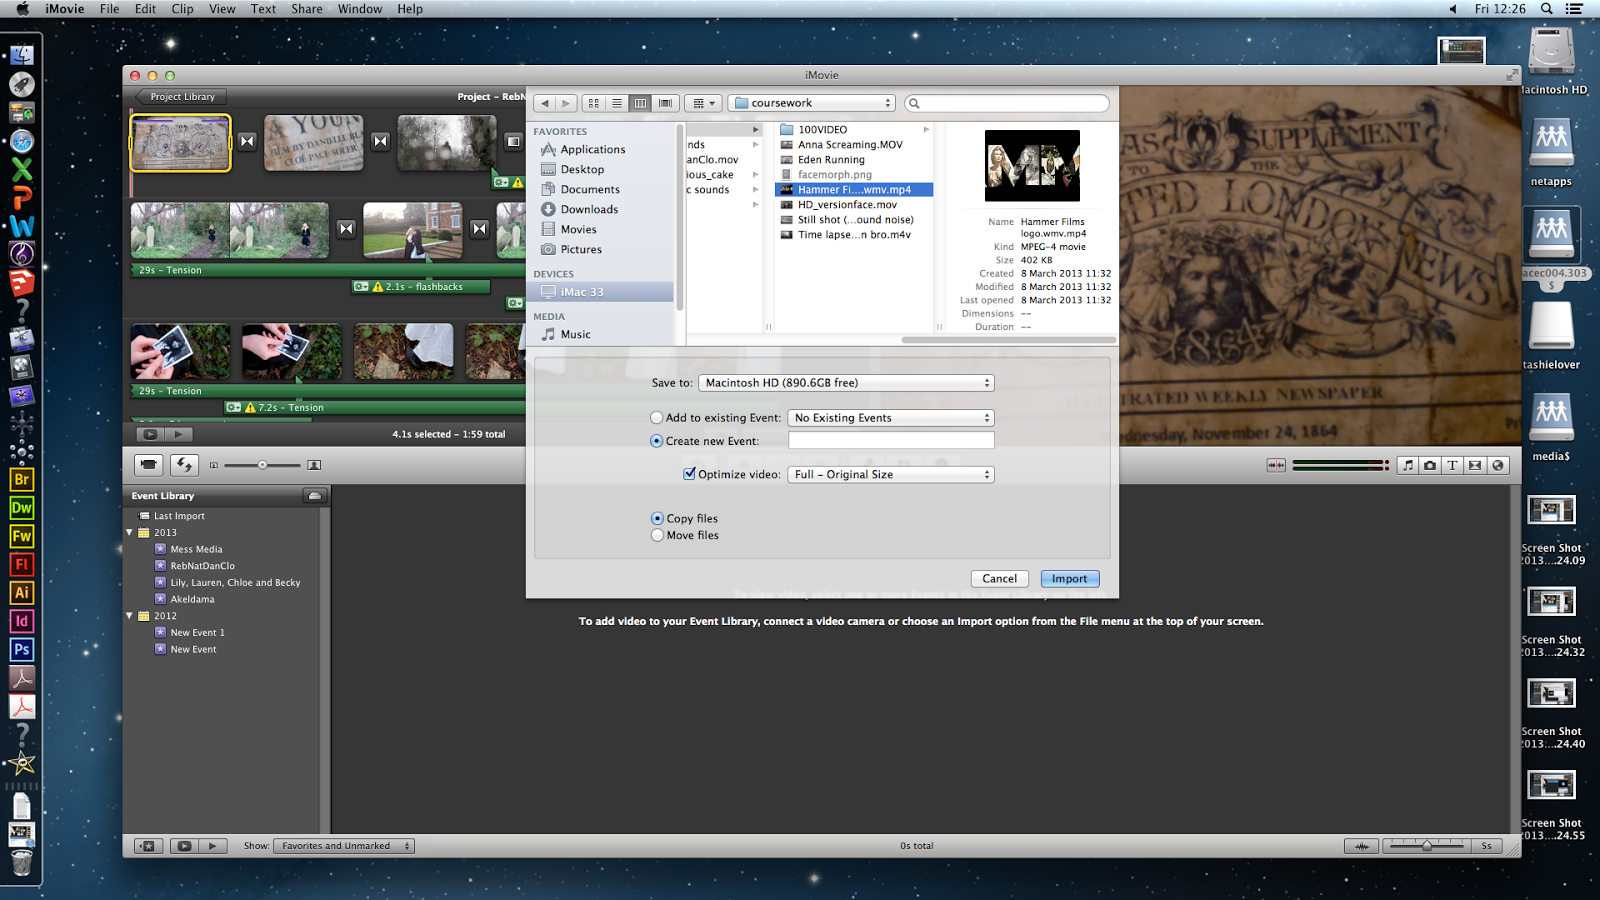
 To extract the production company video from the original clip I needed to shorten the clip at home first by downloading the video and editing it on movie maker, I then uploaded it back onto youtube. Once it was on youtube I downloaded 'Free Youtube Downloader' and copied the url of the production company into the downloader.

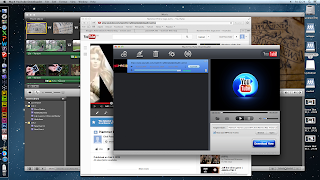
It then downloaded and I saved it in my group's media folder 'RebNat DanClo'

Once the clip had downloaded I imported the file onto imovie and put it at the beginning of our opening...

 This was the final result.
Finalising the editing (ie timings):
When we were close to our final product and we didn't have much left to edit we looked through each section carefully and made sure that everything was done to the best of our ability. We picked up many minor errors in that time, one of the errors was the part with the stairs. We realised that she walked down a few steps and then after a close up of Eden's face, Anna was back up the stairs she walked down. Therefore we simply snipped the clip down to the right length and carried on.
 Editing the stairs:
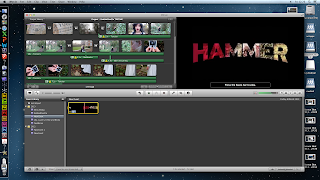
 This part of the opening required a lot of focus, as we wanted Anna's passage down the stairs to seem unnatural. We did this by cutting up the original clip into different size clips which all had different timings. We used the speed section to alter the speed at which the video goes and ensured that a slow part would follow a quick part and so on. But we also varied the quick parts from each other by having one at a speed of 220 and one at a speed of 240 so it would not be identical and very ordered as that was not our aim.
The screen shots down the side show the speeds at which each individual clip is on and demonstrates how we created this effect.
 We inserted jump cuts within this scene to make it more interesting and avoid a boring scene of a girl walking down some stairs. This was a perfect opportunity to show some clips of Eden's memories and reveal a bit more of the plot whilst building the tension to the final revelation.
 We also created tension by playing around with the music, we did this by using the same sounds that we had played throughout the opening, however we slowed down or sped up the piece along with the video to emphasis Anna's movements, we found the music and sound in this section very effective.


It then downloaded and I saved it in my group's media folder 'RebNat DanClo'

Once the clip had downloaded I imported the file onto imovie and put it at the beginning of our opening...

Finalising the editing (ie timings):
When we were close to our final product and we didn't have much left to edit we looked through each section carefully and made sure that everything was done to the best of our ability. We picked up many minor errors in that time, one of the errors was the part with the stairs. We realised that she walked down a few steps and then after a close up of Eden's face, Anna was back up the stairs she walked down. Therefore we simply snipped the clip down to the right length and carried on.
 Editing the stairs:
  This part of the opening required a lot of focus, as we wanted Anna's passage down the stairs to seem unnatural. We did this by cutting up the original clip into different size clips which all had different timings. We used the speed section to alter the speed at which the video goes and ensured that a slow part would follow a quick part and so on. But we also varied the quick parts from each other by having one at a speed of 220 and one at a speed of 240 so it would not be identical and very ordered as that was not our aim.
The screen shots down the side show the speeds at which each individual clip is on and demonstrates how we created this effect.
 We inserted jump cuts within this scene to make it more interesting and avoid a boring scene of a girl walking down some stairs. This was a perfect opportunity to show some clips of Eden's memories and reveal a bit more of the plot whilst building the tension to the final revelation.
 We also created tension by playing around with the music, we did this by using the same sounds that we had played throughout the opening, however we slowed down or sped up the piece along with the video to emphasis Anna's movements, we found the music and sound in this section very effective.
Saturday, 16 March 2013
Adobe After Effects attempt
Adobe After Effects attempt
During the editing process of our opening we decided that a face morph would be most effective. To do this we researched into software that would allow us to do so; we soon found Adobe After Effects. However, when using this we faced a few difficulties.
Once i imported the footage into After Effects, i had to trim the footage down, marking the precise starting and ending point. After this i then had to mark the outside of the eyes and then use the playback as a guide to how far the editing would morph the face. One problem was that it was extremely easy to make the face morph look very unrealistic. To overcome this, i had to bare in mind that the markings of the morph had to be believable.

Once i was happy with the morph i had to render the final composition and export it, however many options were missing from my After Effects software possibly due to a unsatisfactory installation of the software. To recover this, I uninstalled and then re installed the software, repeated everything again but this time it allowed me to export it and upload it to YouTube. However, once the file had been converted from an .aep file to an MP4 the face morph did not work sufficiently leaving us with the video below.
As we were drawing closer to our deadline, re-doing this was not an option as face morphing on After Effects was proven to be very time consuming - especially as we were new to the software - therefore leaving us to find another alternative.
The revised face morph
After the face morph created on Adobe After Effects did not work out as originally planned, we realised we had to work hard in researching new software which could create the face morph for the last creative and horrifying push in our opening. We did not want to give up on the face morph idea as we though the build up of tension throughout would end disappointingly if it did not result in a terrifying and unexpected image. Therefore we came up with some new ideas for creating the face morph.
We discussed some ideas about using imovie to fade clips together to try and create our desired effect however after playing around this did not have the edge that we required and so we looked for more software which could assist us.
We eventually found some new technology which none of us had used before called FantaMorph and this looking promising. I downloaded the software and played around with it many times, sharing to the group the outcome of the experiments in order for us to decide whether we wanted to use it or not in our opening.


I edited the second image in GIMP photo editor by adding a wider black background. This meant that I could successfully merge it with the landscape still of our footage. I matched all the points on the face in the first photo (image 1) with the points on the face in the seconds photo (image 2). Image 3 showed a preview of what the photos looked morphed together and I like this as I could see that it made her skin look much more aged and her face more demonic and angry.


I then made sure that I saved the final video as FULL HD so that it looked crisp and clear amongst the rest of our footage.


We decided that the face morph was a bit too fast to be able to see the full effect and so I slowed it down a little. I did this by double clicking the clip and then in the 'clip editor' selecting a slower option on the speed timeline. I chose a slightly slower 70%. I found this speed to be perfect because although it was fast enough to shock the audience it wasn't so fast that you could not see what was going on.
We discussed some ideas about using imovie to fade clips together to try and create our desired effect however after playing around this did not have the edge that we required and so we looked for more software which could assist us.
We eventually found some new technology which none of us had used before called FantaMorph and this looking promising. I downloaded the software and played around with it many times, sharing to the group the outcome of the experiments in order for us to decide whether we wanted to use it or not in our opening.

This is one of the first attempts at the face-morph. To begin with it was difficult working out how to use the software and it did not seem very successful initially as the transition between the first frame and the last was a big jerky and did not look very realistic.


I carried on trying and slowly learned how to use all the functions of the software. The second attempt was better as the transition was much smoother and could hopefully come across as a believable face morph. However I knew as the exported video was portrait it would not look very smooth amongst the rest of our landscape oriented footage. However the last frame of the scary face had very narrow dimensions and this meant that I needed to edit the second picture to make it landscape for the exported video to be able to work in imovie.
 |
| Image 1 |
 |
| Image2 |
 |
| Image 3 |


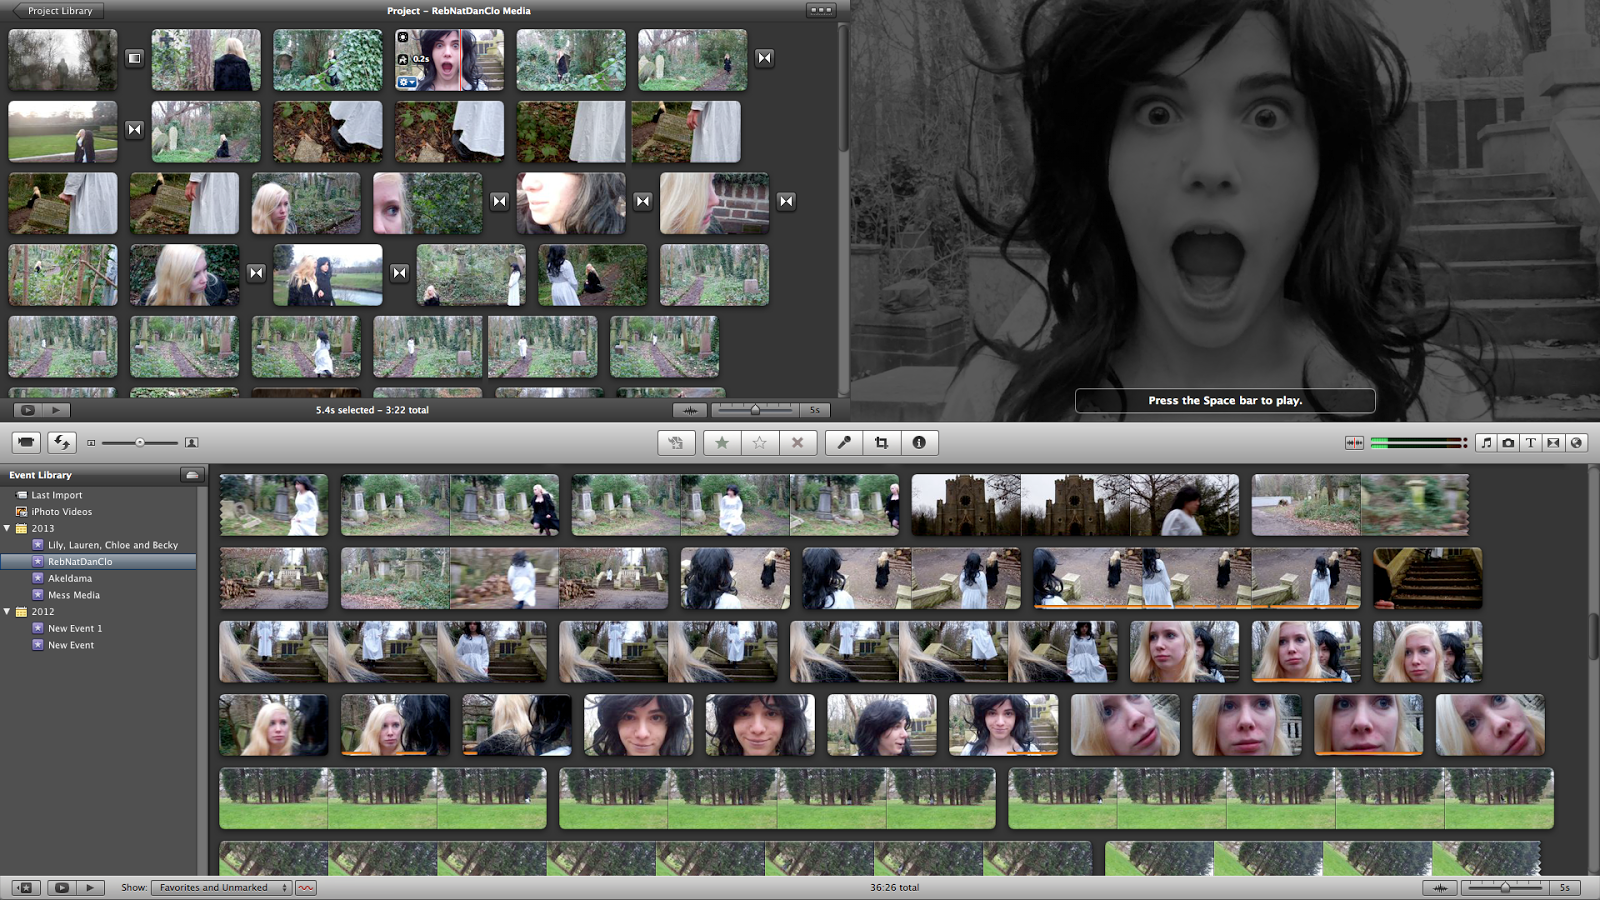
I then had to edit the face morph in imovie to make sure we got across the effect we wanted and it looked smooth and believable among the rest of the footage. I began by dragging the face morph into the project area.

Looking at the face morph, I decided that the final frame did not look very appropriate as the background was black and so I decided to split the clip before it reached the last few frames. This meant that the face would be angry, aged and demonic however the background of the cemetery would still be intact. I split the clip by finding the point where I wanted to split it, right clicking and then selecting 'select clip'. I then deleted the final frames which I did not need.

We decided that the face morph was a bit too fast to be able to see the full effect and so I slowed it down a little. I did this by double clicking the clip and then in the 'clip editor' selecting a slower option on the speed timeline. I chose a slightly slower 70%. I found this speed to be perfect because although it was fast enough to shock the audience it wasn't so fast that you could not see what was going on.
Thursday, 14 March 2013
Editing the newspaper
Finally, the final stage of the newspaper was to choose which parts to incorporate and edit them to make them fit in with the rest of the opening. We wanted it to look creative while still being able to see the words on the newspaper.


We used the close-up panning down shot and the extreme close-up panning across to the right shot to show the audience the brief background to the storyline and also to show them the credits in a creative way. We could have used more creative shots such as the low angle, full shots however it was impossible to see the names and headline in these shots and therefore we would have had to include more shots that two. This would have made the credits run on for too long before the opening and the audience would have become disinterested. For this reason we stuck to only two shots.

We had to start off by stabilising the shots which we slightly shaky. We did this by selecting the smooth clip motion option and this works by zooming the shot in slightly in order to remove any obvious shaking on the edges of the frame.

After this, we sped up the shots using the speed changing option as they seemed too long and dragged on for extended periods of times. This also gave a more uneasy effect as the clips were panned slightly more jerkily and this gave a somewhat canted movement. We selected the 200% option on the speed timeline as we didn't want to make it too fast as it would have been too hard for the audience to read the names.

Finally, we changed the video effect to sepia. We had to do this to match the shots throughout the rest of the opening as discontinuity would have made it look odd and very unprofessional. We chose the video effect of 'sepia' as this gives the clips a more aged effect while not blurring or disfiguring any of the footage, like some of the visual effects such as 'aged film' which made the footage a little blurry. Although this fitted in with our time period we did not want to take away any of the high quality.

This final appearance of one shot of our newspaper after the visual editing.
Wednesday, 13 March 2013
Editing Post: Inserting sound
Editing Post: Inserting sound
Inserting sound into our film opening is one of our very last stages within the making of it. The majority of the diegetic sound was recorded outdoors with a field recorder. The non diegetic sound was produced entirely on logic.
Inserting sound into our film opening is one of our very last stages within the making of it. The majority of the diegetic sound was recorded outdoors with a field recorder. The non diegetic sound was produced entirely on logic.


After adding the sound to scenes, we noticed that some audio needed to be cut down. To do this, we right clicked on an audio track and selected audio clipper in which it displayed the peaks of the sound therefore allowing us to trim the audio specifically to the scene.
We did encounter a minor problem through this process. We didn't want any sound from the actual footage as you could hear us saying "action" as well as being able to hear airplanes. To avoid this we muted all the footage and then applied our produced sound. However, when all sound was added none of it played. The screen shot above shows us unducking a particular scene which is what the underlying problem was the whole time. We then copy and pasted the audio settings - audio being unducked- to all the remaining scenes. Additionally, another problem being that our logic pro files always opened in garageband creating difficulties as synths were missing because it opened in a different software. To overcome this we had to separate the project from the actual composition and upload it to YouTube and then download it as an mp3 into iTunes, therefore we could easily drag our non diegetic sound into place.
We did encounter a minor problem through this process. We didn't want any sound from the actual footage as you could hear us saying "action" as well as being able to hear airplanes. To avoid this we muted all the footage and then applied our produced sound. However, when all sound was added none of it played. The screen shot above shows us unducking a particular scene which is what the underlying problem was the whole time. We then copy and pasted the audio settings - audio being unducked- to all the remaining scenes. Additionally, another problem being that our logic pro files always opened in garageband creating difficulties as synths were missing because it opened in a different software. To overcome this we had to separate the project from the actual composition and upload it to YouTube and then download it as an mp3 into iTunes, therefore we could easily drag our non diegetic sound into place.
Tuesday, 12 March 2013
Developing ideas: storyboard transformation
Our opening has come a long way since our initial storyboard which we worked on towards the beginning of the project. As we worked on the storyboard, we already knew our location, so it was based on that. This meant that when going for our first filming day, (to complete the time lapse we were able to check out exactly what areas could be used and what would work best for each section of our storyboard. We therefore were able to stick to it quite a lot, however, we changed parts of our opening to incorporate different parts of the location we hadn't been able to plan properly in the storyboard. A huge example of this is the stair area in our location, we used this a fundamental part of the second half of our opening, because it allows Anna, one of our actresses to approach Eden, our other actress quietly, providing a scare for both her and the audience, and it creates suspense as to what will happen next. The main idea from our storyboard remained the same from paper to film, however, we did feel that once filming had finished completely in that location, and we began editing it together, it was a little boring, and we felt the audience would immediately guess what was going on and it was not interesting enough. To combat this, we thought about the story behind the characters, we thought about how we could show another side to them in the short space of two minutes, while adding to our story, but keeping it simple enough to follow. We came up with the idea of filming in the nearby location Hall Place. We had a rough idea of what we wanted to film, we wanted to portray the happiness they had both once had, but how it had all come to a horrific end and lead to the original graveyard scenes. For this, we went to location straight away, as we wanted to try as many angles and shots as possible, to make our opening as creative as possible. We filmed a lot of footage, and a lot of it wasn't used, however, on our next visit to that location, we drew up a quick storyboard using the best techniques we found previously and then implemented them into the rest of the shots we filmed. We enjoyed this and were very happy with the results. All of the scenes which do not take place in the grave yard were new, and this shows how we didn't realise exactly how our opening was going to turn out until the editing phase.
Sunday, 10 March 2013
Editing post

Here, place the stop motion editing into the narrative of our filming, and edited the saturation, contrast and exposure levels, so that it went seamlessly with the rest of the footage.


Filming the Newspaper
After the newspaper had been completed we had to film it. We tried to do this as creatively as we could while still making it possible to see the words on the newspaper as we are using it as our credits, having our full names visible.

We included an extreme close-up panning to the right to show the names clearly.

A close-up pan down showing the whole of the newspaper, including our names.

Extreme close-up panning across/around the whole newspaper to show off every element of it like the picture, words and headline.


Low angle full shots of the newspaper to give a different feel to it. This shot gives a strange and canted feel to the audience as we cannot see it properly and it is not the usual angle.

A full shot from above and slightly further away. This shot makes it seem as though it is far away and doesn't place very much emphasis on the newspaper, as if the camera has just stumbled across it.
Overall, the filming of the newspaper/credits has been a success and we have a lot of footage using various angles and shots to choose from.
Visual effects
 During the editing process of our film opening, we wanted to achieve a certain look, to help cement the idea that our opening is based in the past, and we needed to make our flashbacks look different too. In order to do this, we looked at what we could do within iMovie to change the overall appearance. There were a number of preset filters we could use, and at first we decided to use the 'Aged Film' filter. However, this made our opening quite grainy, and we felt that it took away some of the quality of our filming, so we opted for another filter, 'Sepia'. We decided this was a good option as not only did it give an impression of the story happening in the past, but also, the video was of a high quality. We then decided to tweak it further, by changing the exposure, contrast and saturation settings. This meant that we could find a look which we thought fitted perfectly. We made the shots with our actors Eden and Anna in, while they are in the graveyard, quite dark and this would help us with the mise en scene aspect of our opening. Since the darkness would make it quite mysterious and scary for the viewer, which is important since we are working in the horror genre. Once we had found the colours we wanted, our next step was to transfer this to all the other graveyard scenes too. We copied and pasted our created effect onto the scenes, and made a few alterations here and there, especially on close up shots of Eden, our actress, otherwise she appeared to be very pink, which was not the effect we desired.
 We have a second long flash of Anna very near to the beginning of our opening, as we believed it would give a sense of what was to come, and possibly scare the viewer a little. In order to do this, we took the end scene where Anna opens her mouth, just before the face morph occurs, and used visual effects to turn the clip black and white, to make it less clear to the viewer what was flashing up on their screen, intriguing them and making them want to watch more.
 On our flashback scenes, we wanted a completely different look, so decided to once again use the filters in iMovie as a starting point. We thought that the 'Dream' filter looked quite good, as there was an obvious difference to the rest of the opening. We then proceeded to change the contrast, exposure and saturation again, to get quite a harsh, highly contrasted appearance yet happier in some of the beginning flashbacks, to indicate the change in mood and situation as the story progresses.
By applying these visual effects, it has really helped us show the viewer the different scenes and in our opinion made our storyline easier to follow and understand. It also made our raw footage look much better and now we are almost finished editing completely, it helps bring the whole thing together.
Subscribe to:
Posts (Atom)